First a little primer: Ultra Magnus was actually a repaint of "Powered Convoy" before Hasbro introduced him to Transformers as an all-new character. Conveniently, the white repainted Optimus Prime toy hidden inside the armour was ignored until Dreamwave comics introduced the concept that Magnus was in fact physically identical to Prime underneath the armour. From that point on, Hasbro and Takara started producing white variants of almost every Prime toy and called it Magnus.
And they did so with the popular "Classics" line a couple of years ago selling an exclusive 2-pack of "Ultra Magnus" (a white Prime) and a "Sky Warp" (a black Starscream) through Target stores in the USA... but fans had gotten wise... Enter an outfit calling themselves Fansproject.
Fansproject have released an unlicensed trailer kit to complement the white Prime toy making it truly fully Ultra Magnus in his fully armoured Generation 1 appearance. And they didn't stop there. When Hasbro released a black repaint exclusive to SDCC calling him "Nemesis Prime," Fansproject started releasing repaints too.
Since then, the Fansproject kits have sky-rocketed in price on the secondary market. It was only a matter of time before this happened...But did I pay a premium on the secondary market for a rare variant? No! This is a Chinese knock-off. Yes, even the unlicensed and unauthorized products are getting ripped off now!
How is it? Well aside from being a fraction of the cost of an original Fansproject kit, you kind of get what you pay for. At first glance it looks good. Even the packaging and instruction booklet was KO-ed. The KO includes everything you would find in the original (I've heard previous KO iterations were missing the waist piece or other optional bits like the alternate face-plate or missing clip for the sword which normally stores itself under the trailer). All in all, a pleasant surprise how accurate the copy has become.
Now for the bad news.
Check out the smeared glue over the surface! Thankfully, the nature of the trailer is that it's lots of pieces together. So each piece had a separate level of quality and that was the worst of the mess.
On the other side there's what I call over-trim. The white stress mark is the result of someone breaking off the flash after this part left the mold. Amateur work. But again... it's a KO and this is what cheap gets you.
Finally I wanted to show the shoulder part. One side is great - almost indistinguishable from the real thing. The other... not so much. There are glue smudges and gaps where the seams should have met (too much glue adding thickness). On the other hand, I would point out that the clips are copied accurately so the shoulder armour does indeed connect with the molded details on the original figure's shoulders.
In fact, the only part that is "non-functional" is the right hand (it won't snap into place). So holding the big gun is out of the question. Since it's a hand though posing it in certain positions will allow it to rest in place (as seen in the full-body picture above).
Overall, I guess I'm willing to let the defects slide because I was expecting much worse. But the KO does come complete as the real thing. And although the booklet pages were stapled in the wrong order, and the box has that pale bootleg printing like they have on pirate CDs, well... like I said, you get what you pay for. It's crap but at least it isn't completely worthless.
Saturday, July 31, 2010
Tuesday, July 20, 2010
Kor Triumphant... finally.
Labels:
Magic: The Gathering
After a steady stream of losses, the Kor came back with possibly the best performance ever in a 4-way free-for-all. My opponents were a white Soldier deck, a customized Sliver deck, and a white-red Ally deck.
First, the Soldier deck played Crusade (whether this was part of a failed strategy or a foolish mistake, we shall never know). All the figures below should be increased by 1 at game-time. Without a doubt, in a game where life totals dropped as low as single-digits among players, this did make a difference. However, I retain the actual non-augmented creature stats to describe my combination plays for simplicity.
My luck started with a decent draw with some lands and several inexpensive cards to play. In only a few turns, I was already crushing the Ally deck next to me with this:
Kor Duelist + Adventuring Gear + Basilisk Collar + Trusty Machette.
On Landfall he is 5/4 Doublestrike with Lifelink value of (at least) 5 and Deathtouch. Note that none of the cards in play cost more than 2 mana. I specify "at least" because if a blocking creature is killed on the First-Strike phase of the Doublestrike, then there is no damage dealt after that in normal combat phase.Having a Land to play each turn triggered the Landfall on Adventuring Gear. I became unstoppable by kicking Kor Aeronaut (granting Kor Duelist the Flying attribute) while playing also a Sejiri Steppe during another turn (granting him protection from whichever colour blocker my opponent had untapped).
Turning my attention to the Soldier deck afterwards, I was thrown for a loop when I was finally stopped by a Wall of Nets and Holy Day. That is, the defender blocked, prevented all combat damage, so both combatants survive, but then the attacker is exiled. However, I did have a lot of Lands on the table by this point. So I rearranged several creatures and equipments to the following configuration:
Armament Master with Trusty Machette and Explorer Scope (4/3)
Knight of Cliffhaven (level 1) with Basilisk Collar (6/7)
Kor Aeronaut with Adventuring gear (6/6)
The Sliver deck was gaining momentum (as it always does late in the game). So watched carefully until one crucial mistake... it completely tapped out to bring out a Sliver Queen. It's big and scary (plus the cross-effects of the other Slivers in play gave it several additional attributes. But after considering the math against a single blocker, I took my chance...
I declared Attack with all 3 of my creatures.
The Exporer's Scope triggers and I check the top card of my library. It was a land.
This triggers Landfall on Adventuring Gear and Kor Aeronaut becomes an 8/8 Flying.
Total damage across all three was 18/16 with a Lifelink value of at least 9.
This eliminated the Sliver deck from play. And if that weren't lucky enough, my final opponent continued to have mana issues so for the next turn, I took the time to Level up.
Knight of Cliffhaven (Level 4) with Basilisk Collar (8/8)
Since he's Flying and Vigilence, I attack each turn gaining more life than the Soldier deck can deal without fear of losing a potential blocker.
Finally, I move the Adventuring Gear to Armament Master bringing his bonus up to a +6/+6 so Knight of Cliffhaven can attack and block for 10/10 total. My Lifelink continues to swing my life-counter wildly up and down while the Soldier deck sends Shadow creatures I am helpless against. But it doesn't matter as I'm gaining life much faster than my opponent can deal damage to me at this point. We decide to call it a game.
I hardly ever win free-for-all games. It's nice to do it with a little style and a lot of luck.
Tuesday, July 13, 2010
Fortress of Redemption Build 2
Picking up from my previous post, here is the tower coming together.
The main tower assembly comes together very quickly. It is made up of a grand total of 5 pieces. Two walls glue together as I mentioned before. They are large enough to allow for a bit of give but the pieces fit very well so don't be afraid to mash those edges into the corresponding grooves. Then wait for the two tower-halves to dry: they must be solid enough to withstand a bit of rough handling while you fit the two halves together with the roof panel... it's kind of hard to hold while you mess around.
But when it's done, is it ever done!
The plinth is even easier: again 4 walls to make 2 halves. then glue those 2 halves together! From this point on, the tower is almost snap-fit. Feel free to use a lot of glue for this part: those are some big assemblies.The only major assembly for the building left is the walk-way that connects the turret bunker, the tower, and the missile silo. And if you worked on Cities of Death kits before, then you are in familiar territory... but kind of in reverse.
At this particular moment, the commander couldn't help wondering how the assemblies came together. As you can see, I started the walkway but left the missile silo sitting right up against the tower. The walkway starts with the floor and stairs before...
...getting more walls. The stairs go on first, then the walls around it. Each wall squeezes up against the previous to form a solid corner.
This kit features some of the longest and widest single parts I have ever seen from Citadel Miniatures. But impressively, there is no sign of warping and the fit, for pieces large and small, is beautiful. As you build up the walls, each one slots right into the floor and stairs already glued together. But I can't stress enough the basic practice of model kit building: test-fit if you're even unsure. Yes, those stairs do fit in the slots on the wall interiors at an angle. Trust me on that. :-)
Monday, July 12, 2010
Fortress of Redemption Build 1
Here's a look at my latest build. Ever wonder what exactly is in this box? Well... it's this:Stacked neatly and evenly are 8 sprues. Enjoy this for a moment because after clipping the parts off the sprues... this kit will never fit into this box again.Yes, as it turns out, the entire kit is large but in reality very simple. Lots of large panels and the central tower is made up of pretty much 4 solid walls parts. The rest of the bits are for optional decorations like spotlights or heavy-bolter emplacements.
The first hour or so of the build is devoted to the near identical bunkers. In fact, it gets kind of boring when you realize you are essentially doing the same piece 12 times in a row to make their walls. You do get a choice or 3 wall designs and 3 accent pieces to mix and match with. The floors of the bunkers are cleverly molded as the same sprue... upside down. Take care to glue in the 2 different floor cut-outs so that they are flat with the rest of the floor.
If you aren't aligned, you will have trouble fitting the final wall panels. The missile silo is more forgiving since it doesn't form a totally enclosed hemisphere. My turret however needed to have part of its floor shaved down for the last wall to align with the rest of the edges.
Here I got started with the tower... and my commander is eager to check out the new digs. The final tower comes in 4 very large walls. Be careful with the super-glue: less is more. You may need to wiggle the 2 walls around to fit everything and too much glue dripping all over won't help matters. On the up side, the edges wrap around each other. Test fit to see which edge is hidden: the hidden one you can shave and cut as needed. But the other is full of rivet details you need to watch out for when you're shaving your flash.
Next time: tower build mounted on its base, and the walkway...
Sunday, July 11, 2010
One Month with a Milestone
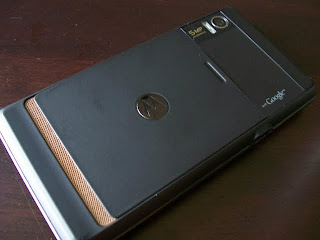
Motorola Milestone (aka: Droid) is not only my first Android OS experience, but it's also my first smart-phone.
Android is remarkable in its ability to be entirely unremarkable. At first I was concerned that my new phone did not come with any substantial documentation. But this worry quickly evaporated as I got used to Android's "if you don't see it, it's probably nothing to bother with" attitude.
For example: you never really quit an app. Instead you just leave and do something else. Android will allocate resources on the fly as required.
However, it does lend itself to some unusual quirks. Some of these quirks, I still haven't decided if they're bugs or actual features. The strangest thing that occurs is the auto-resume of media play-back. After a month of seemingly normal operation, this actually happened to me just a few days ago: an MP3 just started playing while I used the phone for something else. I had to switch back the media player, and press the Play button twice: first to reset it to its "play" position, then back to the "pause." This is the foremost irritation of the that "if you don't see it" attitude. You never shut down a function. The MP3 player is never "stopped."
As for the phone's performance, after my first month with the device, I'm fairly pleased with it. Little issues such as unintentional key-presses to the touch-screen, I can blame on myself for being butter-fingered. This is, thankfully, a far-cry from the recent hold-your-iPhone-the-wrong-way-and-lose-signal-strength gaffe. Normal voice is crisp and clear-sounding.
I'm loving the slide-out keypad. It's a nice clicky-feedback for typing a reasonable length email or messaging or tweeting. Overall, it's surprising how comprehensive connected-life with a smart-phone could be. I even got comfortable traveling without my laptop once I had the Facebook and Twitter apps installed. Browsing over wi-fi is great, but 3G is a bit over-rated.
I've only had a few glitches (which will blame on Android rather than the phone itself).
First: there's the weird misfire resume-media I described above. I'm told it's a feature that's supposed to kick in when you hang-up a phone call (because an incoming call automatically pauses currently-playing media).
Second: I don't know why typing a "hyphen" on the keypad doesn't always advance my cursor. I end up putting a hyphen at the end of two joined words instead of between them.
Third: Too many photos on the phone seems to give the media gallery trouble indexing the photos. I reached about 50 pictures taken with the camera (which by the way is a respectable 5.0Mpx) when I noticed I had trouble browsing them. I have since transferred them to my laptop through the Micro-USB cable.
Which brings me to a final and out-of-the-way side observation before I end this post. Motorola got clever with their included cable: their version of the micro-USB plug includes a couple of extra nubs to make it snug to the port on the phone. I only noticed this after getting a spare cable from monoprice which turned out to be slightly too loose causing an unreliable connection (a drop of super-glue to add just a touch of thickness to the plug fixed that problem).
Overall, I've been very pleased with my first smart-phone experience. Now to simply wait for Android to mature a bit and hopefully solved these glitches.
Subscribe to:
Posts (Atom)